

Houseplants thrive when given space to grow, and refreshing their environment makes all the difference. Through trial and error, I’ve learned that timely care keeps greenery vibrant. This isn’t just about swapping containers—it’s about renewing nutrients and giving roots room to breathe.
Healthy growth starts with quality potting mix and proper drainage. Experts like The Sill emphasize avoiding “killing with kindness” by overwatering. Choosing a container slightly larger than the current one prevents soggy soil, while holes at the bottom ensure excess moisture escapes.
I’ll walk you through stress-free steps I use for my own collection. You’ll check for signs like crowded roots or soil that dries too fast. Gentle handling of stems and a fresh layer of soil around the base revitalizes tired plants without shock.
Whether your green friend needs a new home or just a nutrient boost, this method works. Let’s create a happier space for your leafy companions—one pot at a time.
Getting Ready: Tools, Potting Soil, and Essential Materials
Having the correct supplies on hand makes repotting less stressful for both you and your plants. I start by clearing my workspace and laying out everything within reach. This avoids mid-process scrambles and keeps the focus on gentle care.
What You’ll Need for Repotting
A sturdy pair of gloves protects your hands from rough soil or prickly stems. My go-to tools include a hand trowel for scooping fresh potting mix and a butter knife for loosening compacted roots. Brands like The Sill recommend using containers 1-2 inches wider than the current pot—this gives roots space without drowning them in excess soil.
Choosing the Right Pot with Proper Drainage
Drainage holes at the bottom are non-negotiable. I’ve rescued many houseplants from soggy doom by prioritizing pots with at least one hole. Terra cotta breathes better than plastic, but any material works if it allows water to escape freely. Pair this with a well-draining mix to prevent nutrients from washing away.
My checklist always includes fresh potting soil—old dirt loses its vitality over time. I layer an inch at the base of the new container before settling the plant in place. With these basics covered, you’re ready to give your green companions room to flourish.
Recognizing When Your Plant Needs a New Home
Your green companions show clear signals when they’re craving more space and nutrients. Over the years, I’ve noticed patterns that scream “help!”—like roots staging a jailbreak or soil turning into concrete. These aren’t just quirks; they’re urgent requests for intervention.
Signs Your Roots Are Crowded
Peek under the pot. If white tendrils dangle from the drainage hole, it’s like roots waving a white flag. I once ignored this with my fiddle-leaf fig—it became so top-heavy, a gentle breeze nearly toppled it. Compacted soil that repels water is another red flag. Roots circling tightly in the current pot leave little room for growth or nutrient absorption.
Indicators of Nutrient Depletion and Soil Issues
Old potting mix loses its fluffiness, becoming dense and crumbly. My peace lily’s leaves yellowed despite regular watering, until I realized the soil had turned acidic. Slow growth or leaves shrinking in size? That’s your houseplant rationing its limited nutrients. A quick finger test works wonders—if the base feels bone-dry within days, fresh soil is overdue.
I always check these markers every 12-18 months. Plants won’t shout their needs, but they’ll show them plainly to those paying attention.
Mastering How to Repot a Plant: A Step-by-Step Process
Transforming a root-bound specimen into a thriving green companion requires patience and precision. I approach this process like a gentle negotiation—persuading roots to explore fresh territory while preserving their delicate ecosystem.
Liberating Roots with Care
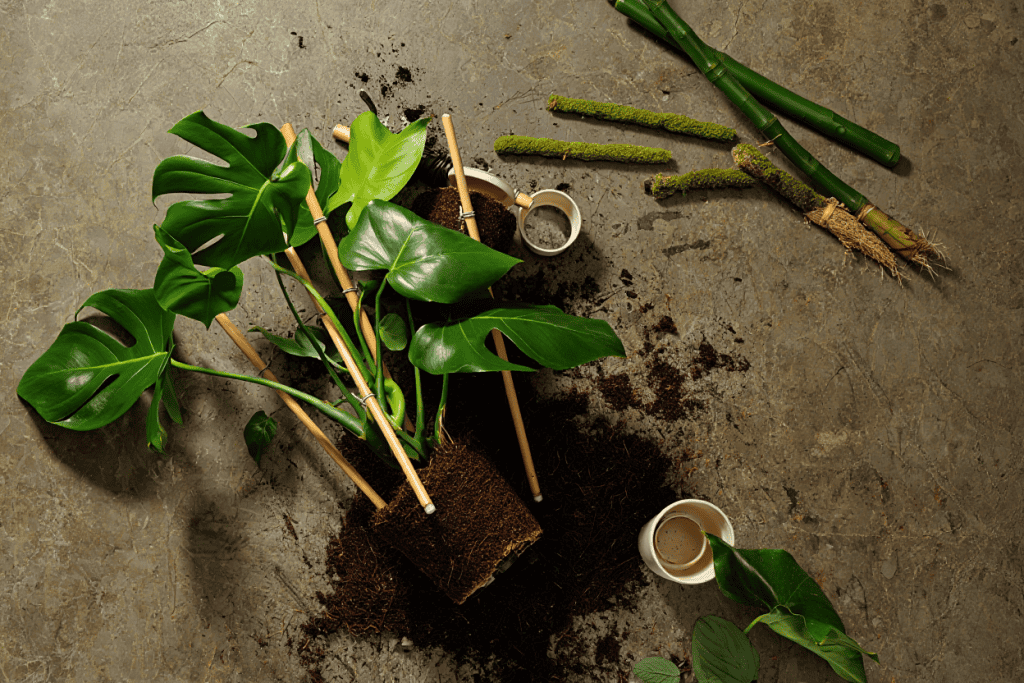
Turn the current pot sideways and tap its rim against a table. If the plant resists, slide a butter knife around the inner edge. Cradle the base of the stems as you lift—never yank by leaves! My monstera once snapped three aerial roots until I learned this hands-free technique.
Revitalizing the Foundation
Gently tease apart the root mass with your fingers. Trim any blackened or spaghetti-thin strands using sterilized scissors. I shake off about 30% of old soil—enough to expose roots without stripping protective microbes. Layer fresh potting mix at the bottom of the new container, creating a mound for stability.
Strategic Positioning Matters
Center the plant so its base sits 1″ below the pot’s rim. Add potting mix around the sides, tamping lightly to eliminate air pockets. Leave a small watering well at the top. My pro tip? Use chopsticks to distribute soil between dense roots without compacting it.
Essential aftercare steps:
- Water thoroughly until it drains from the hole
- Skip fertilizer for 4-6 weeks
- Provide bright indirect light during recovery
I’ve revived countless houseplants using this method—even a parched fern that hadn’t been moved in seven years. Your green friends will reward you with vigorous new growth when given room to stretch their roots.
Tips and Tricks for a Stress-Free Repotting Experience
Those first few weeks after moving your green friend to a new pot are critical. I’ve found that mimicking their natural environment helps them settle faster. Let’s explore simple ways to avoid common pitfalls while keeping your houseplants perky.
Water Wisdom for Fresh Soil
Overwatering is the #1 killer of newly relocated plants. I wait 48 hours after repotting before giving a thorough drink—this lets damaged roots heal. Always check the soil 1″ deep with your finger. If it’s damp, hold off.
| Pot Size | Watering Frequency | Drainage Check |
|---|---|---|
| Small (4-6″) | Every 5-7 days | Should drain in 20 sec |
| Medium (8-10″) | Every 7-10 days | Drains in 30-40 sec |
| Large (12″+) | Every 10-14 days | Drains in 1 min |
Root Rescue Tactics
When I encounter tightly wound roots, I make four vertical cuts along the sides with clean scissors. This encourages outward growth without shocking the system. Dusting trimmed areas with cinnamon powder prevents infections naturally.
Pro tips for stressed plants:
- Use room-temperature water to avoid root shock
- Add perlite to potting mix for better airflow
- Rotate pots weekly for even light exposure
My fiddle-leaf fig once dropped six leaves post-move. By adjusting its drainage and light levels gradually, it sprouted new growth within three weeks. Remember—patience and observation are your best tools.
Seasonal Considerations: When to Repot for Best Results
Timing matters as much as technique when refreshing your green companion’s environment. I’ve found that aligning with nature’s rhythms reduces stress for both you and your leafy friends. Seasonal shifts impact root development and moisture needs—ignore them, and even careful work can unravel.
Spring’s Renewal Powers Growth
Early spring is my golden window for most repotting plants. As daylight increases, roots enter their active growth phase. My fiddle-leaf fig doubled in size last year after a March move to a larger pot. Mild temperatures help plants recover faster than during summer heat waves.
Weather-Proofing Your Routine
Summer demands extra attention to watering in new pots. I reduce direct sunlight exposure for the first week to prevent leaf scorch. Come winter, I wait 10-14 days between waterings—cold slows soil drying. For desert natives like snake plant, I skip winter moves entirely.
| Season | Watering Frequency | Light Adjustment |
|---|---|---|
| Spring | Every 7 days | Bright indirect |
| Summer | Every 5 days | Morning sun only |
| Fall/Winter | Every 10-14 days | Rotate weekly |
My pro tips: Always check drainage holes after heavy rains. Use potting mix with extra perlite in humid climates. These tweaks keep plants thriving through seasonal mood swings.
Final Thoughts on Nurturing Your Newly Repotted Plant
Nurturing doesn’t end when the last scoop of soil settles. I treat the first month in a new pot like a delicate recovery period. Check leaves daily for drooping or discoloration—these subtle shifts reveal how your green companion adapts.
Adjust watering based on the pot’s drainage speed. My snake plant once sat in soggy mix until I noticed water pooling in the saucer. Now I test drainage holes weekly by pouring slowly and timing the flow.
Hold off fertilizer for six weeks—fresh soil already packs nutrients. Gradually introduce morning sun if moving to brighter spots. I learned this the hard way when my peace lily scorched after an abrupt window shift.
Through trial and error, I’ve seen timid roots transform into vigorous networks. Last spring, my once-stunted pothos produced eight new leaves post-move. Trust the process, and your plants will show their gratitude through lush growth.
FAQ
Can I reuse old potting mix when repotting?
I avoid reusing old soil since it loses nutrients and may harbor pests. Fresh potting mix gives roots a healthy start. If you’re tight on resources, blend old soil with compost or worm castings to revive it.
How do I prevent water from pooling at the bottom of the pot?
Always choose a pot with drainage holes! I add a layer of pebbles or broken pottery shards at the base to improve flow. If your container lacks holes, drill them yourself or use it as a decorative cover over a functional inner pot.
My snake plant’s roots are bursting through the soil—what now?
That’s a classic sign it’s time for a bigger home. Gently loosen the root ball, trim any dead or mushy parts, and upgrade to a pot 1-2 inches wider. Snake plants thrive in snug spaces, so don’t go too large.
Should I water immediately after moving my plant to a new pot?
Yes, but carefully! I give a thorough soak to help the soil settle around the roots. Wait until excess water drains out completely. For succulents or cacti, hold off for a few days to avoid rot.
Can repotting shock my houseplant?
Some stress is normal, especially if roots are disturbed. Minimize it by working quickly, keeping roots moist, and placing the plant in indirect light for a week. Skip fertilizing for 4-6 weeks to let it adjust.
Is tap water safe for freshly repotted plants?
It depends on your local water quality. I use filtered or rainwater for sensitive species like calatheas. For most houseplants, letting tap water sit overnight to evaporate chlorine works fine.
How often should I refresh the potting mix without upsizing the pot?
Every 12-18 months for heavy feeders like monsteras. Gently scrape off the top 2 inches of old soil and replace it with fresh mix. This boosts nutrients without disturbing the root system.
Recent Posts
The Grocery Store Is Charging You for Convenience You Don't Actually Need
Look at your last grocery receipt. Not the total -- you already know that number. Look at the individual items. The jar of pasta sauce for $7.49. The bag of granola for $8.99. The bottle of ranch...
There is a jar of peanut butter in most American kitchens right now. It has been there so long that nobody really thinks about it anymore. It gets scooped onto toast, spread onto apples, stirred into...